8.1 Tööriistad – Bending tools
A press brake is a machine tool for bending sheet and plate material, most commonly sheet metal. It forms predetermined bends by clamping the workpiece between a matching punch and die.- Wikipedia
Bending process illustration: www.machinemfg.com
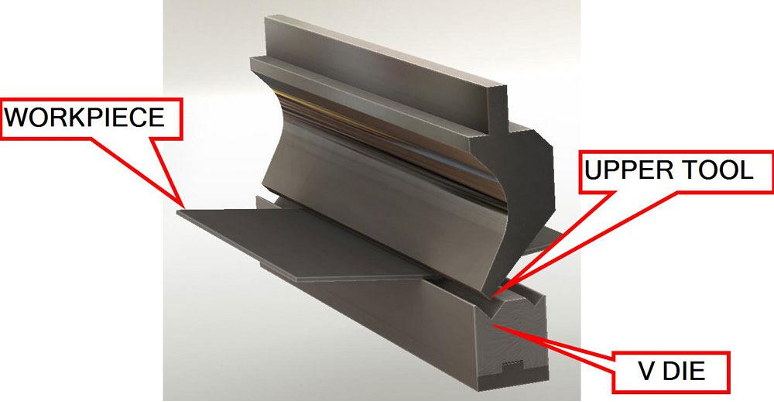
For bending operations the press-brake machine is used. There are three main parts in the bending operation: (see Figure 1)
- Workpiece
- Upper tool
- Lower Tool
6.2 Tool details
Top tool or punch – top tool which is connected to the top beam of the press brake.
Die – bottom tool which is connected to the bottom table.
Punchholder – top clamping unit with the fixation elements and intermediate elements to hold the punch inside the unit.
Die holder – bottom clamping tool with fixation elements to hold the die on the table.
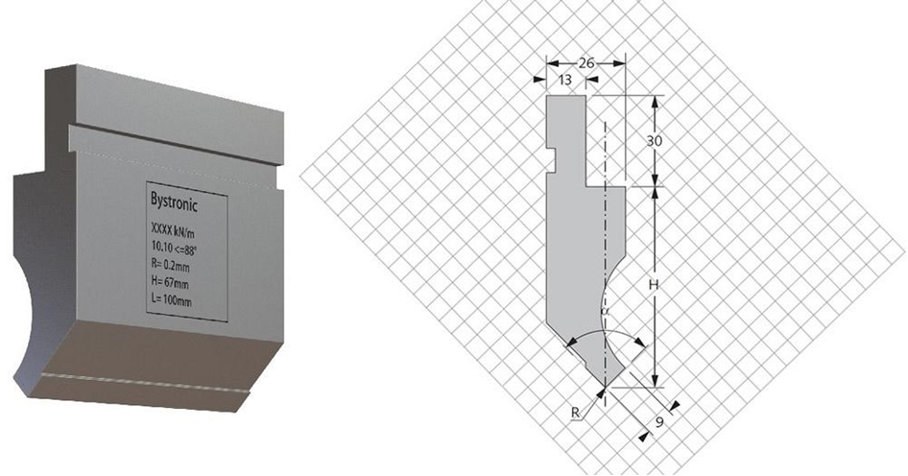
Angle of the tool – angle of the punch tip or die groove as desired with the tool geometry.
Radius of tool – radius of punch tip at the end or external radius of the die (two external points of the die) or the internal radius of the die (internal radius inside the groove of the die).
Groove of the die – internal groove of the die (V-opening) as the detail of the bottom tool.
Multi-V dies – special dies with the several V-openings on different sides for the universal use.
T-shape dies – T-dies as the 1-V dies with the different heights.
Height and width of the tool – external sizes of the tools.
Tool details are presented on the Figure 2
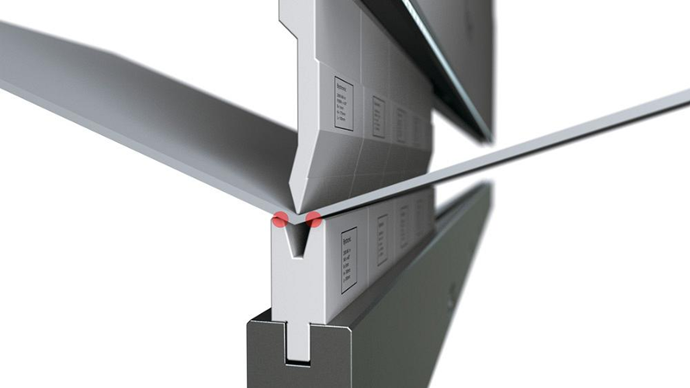
Press brake tooling consist of the die and punch, which are necessary in metal forming. Although press brakes have evolved into multi-axes, high-precision machines with self-stabilizing features, the tooling is all that ever actually touches the part during bending (see Figure 3).
For the tools there are different special features, which have a great importance in practice.
- Segmented sections. These allow to build various lengths out of several precut pieces. Small pieces are safer and easier to handle.
- Self-retaining installation. You should be able to load the tools with the ram up. The tool-holding system should hold multiple pieces in place until the clamping pressure is applied (see Figure 3).
- Self-seating. As clamping pressure is applied, the punches are mechanically pulled up into position. This eliminates the need to bottom the punch into the die during the setup.
- Front loading. You should be able to install tools from the front of the machine. This shortens setup time because you no longer need to spend time sliding tools from the end of the press brake. In most cases, front loading also eliminates the need for forklifts and overhead cranes.
- Standard sizes. Common-height tools can reduce the need for machine adjustments when changing jobs. Front support arms, back-gauge heights, and safety devices all remain at a common position. And because tools are made to the same heights, you can add off-the-shelf pieces and be sure they will match your existing tools.
Many high-quality press brake tools are made to metric standards. V opening is actually 6 mm, or 0.236 in. Moreover, bends in sheet metal have slightly elliptical corner radii, so you only have to get close to get correct.
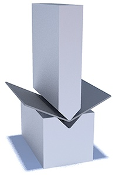
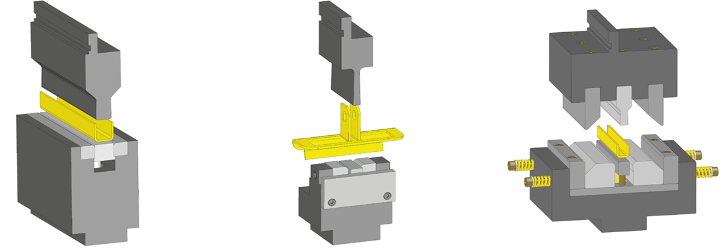
Best practices in tooling selection really should have one elegantly simple goal: to achieve the best-quality parts in the least amount of time possible. An example of a bending operation is presented on the Figure 4.

A maintenance shop will need and use different press brake tools than a custom fabricator will. So before diving into specifics, identify your needs and budgetary constraints.
For instance, you might need additional tools to shorten setup times. You might follow lean manufacturing principles and recognize the benefits of having a separate tool library for each press brake—and hence, be willing to invest in duplicate sets of tools stored at machines. You don’t lose valuable setup time walking to and from the tool crib and elsewhere looking for the correct tools. An added benefit here is that tool style compatibility from machine to machine is no longer necessary, because the tools tend to stay with their intended machine.
If you need to buy additional, duplicate tools to expand each brake’s dedicated tool crib, choosing them is relatively straightforward. You’ll often find these tools located in convenient places, if not already in the press brakes. Look for the tools with the most wear and tear—those with shiny, bright working surfaces. The body of the tools will likely be clean and bright too. Rusty, dirty tools on the bottom of the rack are not likely candidates.In the following different press-brake tools and their important features are described (Press brake tools description).
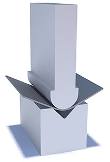
 | Standard punches and dies Standard punches and dies for press brake are required to perform the simple bends for the required degree according to the setup and the stroke of beam of the machine. The standard punches mean straight shape punches to make easy bends. The radius of the internal bend and the angle according to the geometry of the punch. Standard tools usually are the classic to perform the bending of boxes and simple shape parts with your press brake |
 | Radius punches If the internal radius is bigger than standard and should be obtained it is possible to use radius punches or radius inserts for punch holders with the desired radius to perform the large straight radius bending. Depends of the radius usually dies with big opening are used. Depends of the possibilities R=50 or even R=100 could be used. Press brakes with high tonnage are widely used for thick material profiles for heavy industries. |
 | Gooseneck punches To make the U-shape or channel straight punch probably can’t be used because of the collisions with the part and the metal of the punch. For this purposes usually gooseneck punches are used with the shape to have the possibility not to contact with the final flange of the part (radius internal shape). Gooseneck means the special execution of the punch to have the opening at the middle for the end of part. Variety of gooseneck punches could be very big from small till big dimensions. |
 | Gooseneck special punches For complicated profile shapes with closed geometry, special C-shape profiles etc. to perform the beds in U-shape and later – the last bend to close the profile, we are ready to develop and to offer special gooseneck punches according to the special geometry of your profile These punches are manufactured according to the geometry of the profile, possibilities and stroke of your press brake during the bending to prevent any collisions and usually to make the job with one tool even if usually it takes several different punches. |
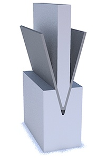 | harp bends punches and dies To perform the sharp bends usually punches and dies with the 26-28-30 degrees are used (or knife punches). The reason for the requirements of sharp bends could be different but usually it is the pre-bend (first bend) of the part to be flattened after with side to the side. Prebending with such way could be the reason of minimal deformation during the future flattening. |
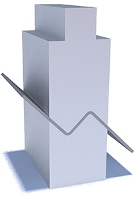 | Z-bend press brake tools Special press brake tools (punch and die set or offset tools) could be used for special deformations with the way of stamping, for example Z-bend in one bend. To perform the bending of this way the geometry of the shape is usually used so the way of the deformation is other than the air bending. The other stamping general job is to perform ribs on the sheet-metal with the use of press brake. |
Bending operation
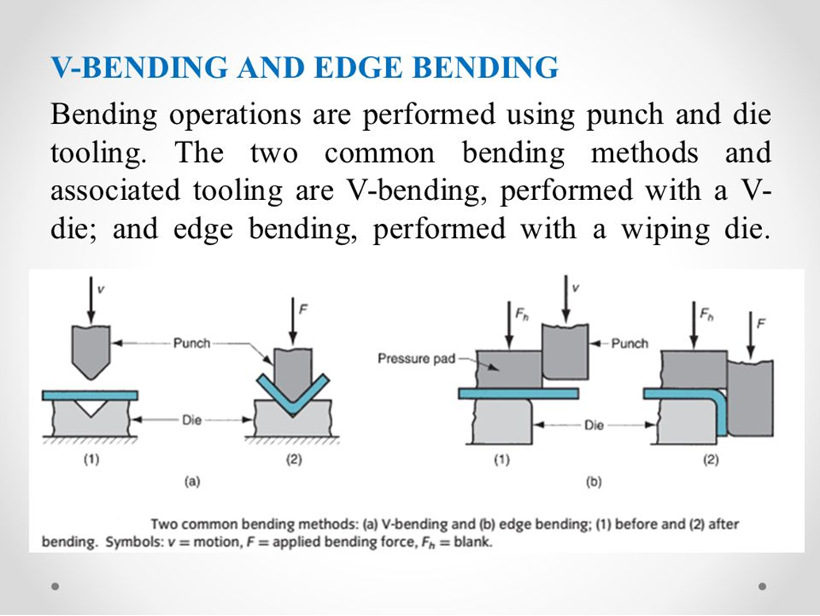
6.3 General information about tools
The tools can be long (one tool over the entire bending length) or can be assembled in several pieces to achieve the desired bending length. The length of the tools significantly affects the efficiency of the bending process. The number of tool changes per day can be 5 to 20. The installation of long tools usually requires the intervention of several operators and transportation requires forklifts.The operator alone can handle and install short tools. With a large number of tool changes, the effect of using short tools is noticeable. The parallelism of the tool (possibly a small variation in the height of the tool) is important for achieving good bending accuracy. Short tools can be made with much more precise geometrical tolerances. Based on the above considerations, the use of short tools is recommended. The standard produces tools in two lengths: 835 mm and 415 mm (see figure). Such tools make it possible to assemble the bending machine with sufficient flexibility.
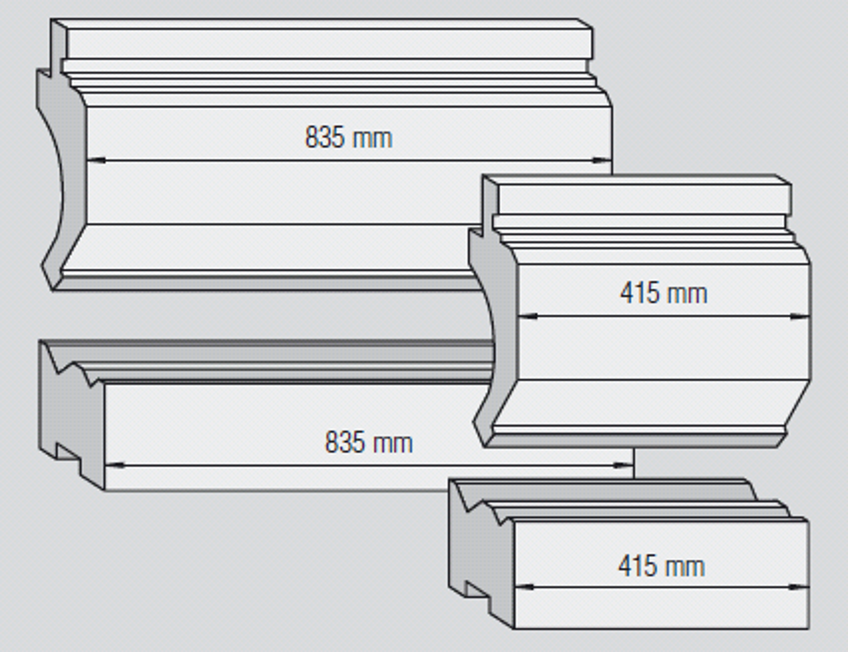
Tool cross section
The tools are characterized by the same cross-section along the entire length of the tool. Orienting in these parameters helps you quickly find the right tools and avoids using the wrong tool. Here are some important parameters to keep in mind. Figure 3.108 shows a cross section of the stamp. In the case of cross-section, there are three important parameters on the basis of which stamps are classified: (1) apex angle, (2) shape, and (3) height (height from the apex of the stamp to the supporting surface is important). Stamps are made with apex angles of 30 °, 45 °, 60 °, 88 ° or 90 °. Stamps with an angle of 30 ° and 45 ° are used for angular bends and stamps with 60 °, 88 ° or 90 ° for 90 ° bends.
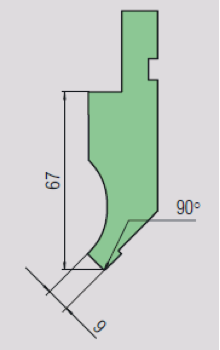
The cross-sectional shape of the stamp determines the type of bending that can be performed. See Figure 3 Special shapes of stamps. Choosing the right tools is very important.

Die
The dies are classified according to the shape of the V-groove and the number of grooves. Single-groove dies are called 1V dies, dual-groove dies are called 2V dies, and so on. Dies with 3 rectangular grooves are called 3U dies (Figure 4 Different cross-sections of dies (see figure below)).

Different cross sections of dies
The dies are generally attached to the table of the bending machine by means of a die holder. The die holder is centered relative to the top blade. If a different V-groove width is required for the next product, the dies can be quickly removed from the die holder and fitted with a suitable die. There is no need to re-center. The figure below shows diagrams of die holders for quick-change 1V and 2V dies.

Die Selection
To get the biggest bang for your buck, choose a minimum number of lower dies that will cover the entire range of metal thicknesses your shop forms. Shops with little tribal knowledge, unforeseen applications, and limited budgets should try selecting lower dies using the 8×2 rule.
First, determine the range of metal thicknesses you want to bend. For example, you might need to bend material 0.030 in. through 0.250 in thick.
Second, assess the smallest V die needed by multiplying the thinnest metal by 8. In this case, 0.030-in. material would need the smallest die, hence: 0.030 × 8 = 0.24, which we’ll round up to 0.25.
Third, assess the largest V die needed by multiplying the thickest metal by 8. In this case, the thickest material of 0.250 in. would need the largest die: 0.250 × 8 = 2.
You’ve now determined the smallest and largest die you need—0.25 and 2 in. To fill in what you need in between, you start with the smallest V die and double its size. In this case, that gives you a 0.5-in. die (0.25 × 2 = 0.5). Next, double the 0.5-in. die to get 1.0 in., then double that to get 2.0 in. This gives you a minimum of four different V-die openings to bend 0.030- to 0.250-in. material: 0.25, 0.5, 1.0, and 2.0 in.
Punch Selection
You also use material thickness to determine the minimum number of upper punches. For material 0.187 in. and thinner, you can use an acute offset knife punch with a 0.04-in. radius. The acute angle allows bending past 90 degrees, and the offset allows you to form J shapes. To handle the higher forces when forming material between 0.187 and 0.5 in. thick, consider a straight punch with about a 0.120-in. radius.
Note that for some applications, including those using thicker and high-tensile material, the workpiece tends to crease, crack, or even split in two when using common industry bending standards. It comes down to physics. A narrow punch tip exerts more force on the bend line; combine that with a narrow V-die opening, and the forces rise even more. For challenging applications, and especially when material thicknesses are above 0.5 in., it is best to consult your material supplier on the recommended punch tip radius.
Punch Selection Rules
For L shapes the rules are … there are no rules. Almost any punch shape will work. So when selecting punches for a group of parts, you always should consider these L-shaped parts last, considering just about any punch shape can handle them.
When forming these L shapes, use a punch that also can form other parts, rather than adding unnecessary tools to the library. Remember, when specifying tooling, less is always best—not just to minimize tooling cost, but also to reduce setup time by reducing the number of tool shapes needed on the shop floor (see Figure 5).
Other shapes do require specific rules for punch selection. For instance, when forming J shapes, the rules are (see Figure 6):
When the small up-leg is longer than the bottom leg, you need a gooseneck punch.
When the small up-leg is shorter than the bottom leg, any punch shape will work.
When the small up-leg is equal to the bottom leg, you need an offset acute punch.
As you can see, the punch selection rules deal mostly with workpiece interference, and this is where bending simulation software can play an important role. If you don’t have access to bend simulation software, you can use your tooling supplier’s drawings with grid backgrounds to check for punch-part interference manually (see Figure 7).
